Posted on

Life in the Bee Yard – March 2019

The Bee Yard

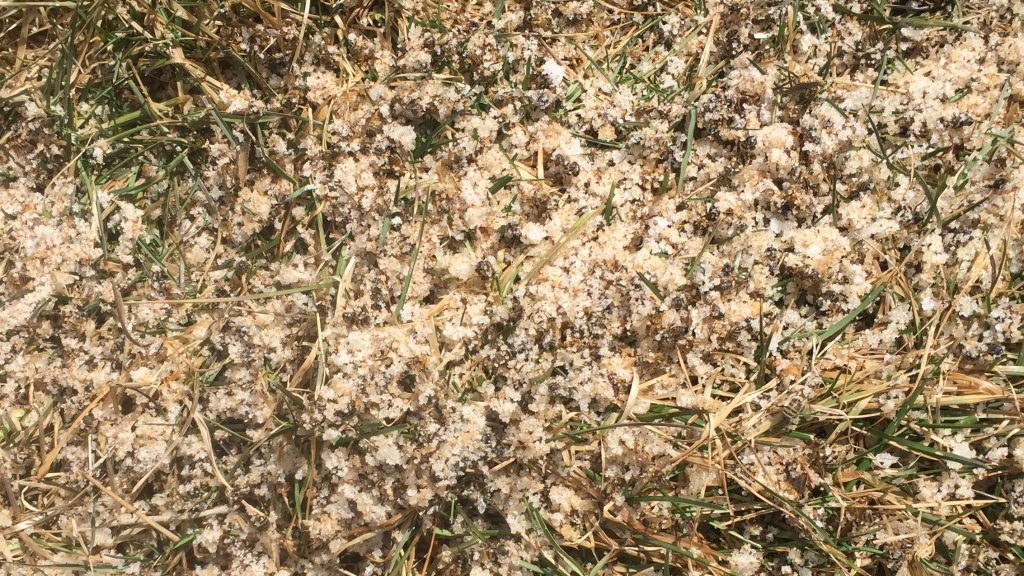
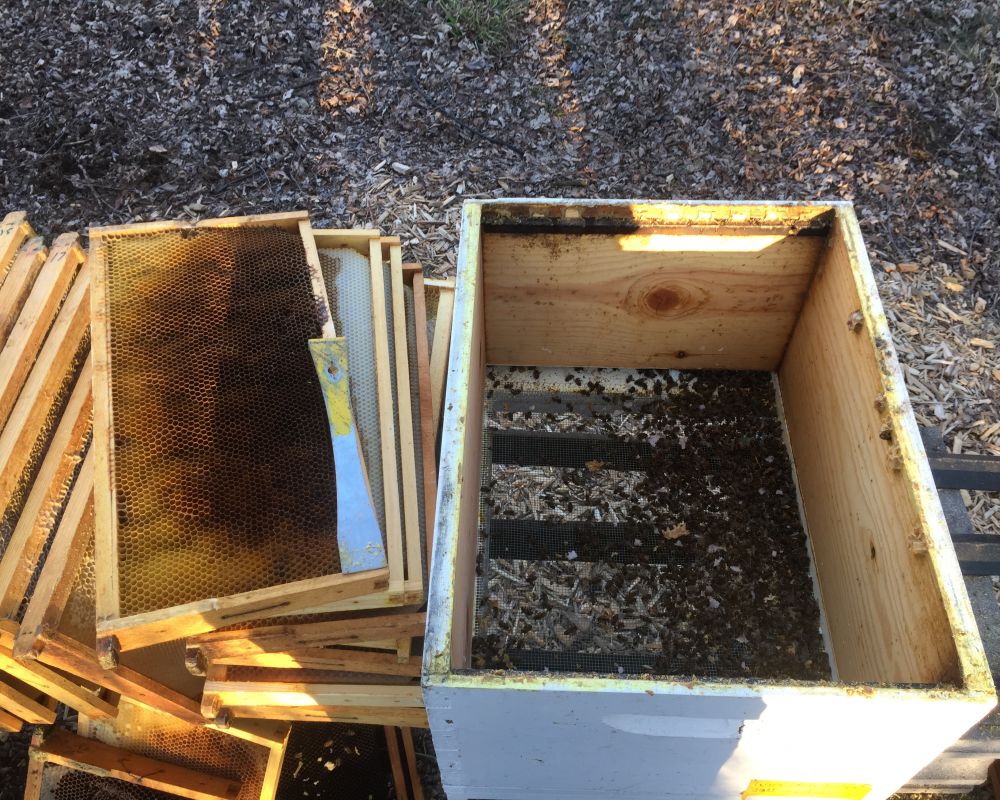
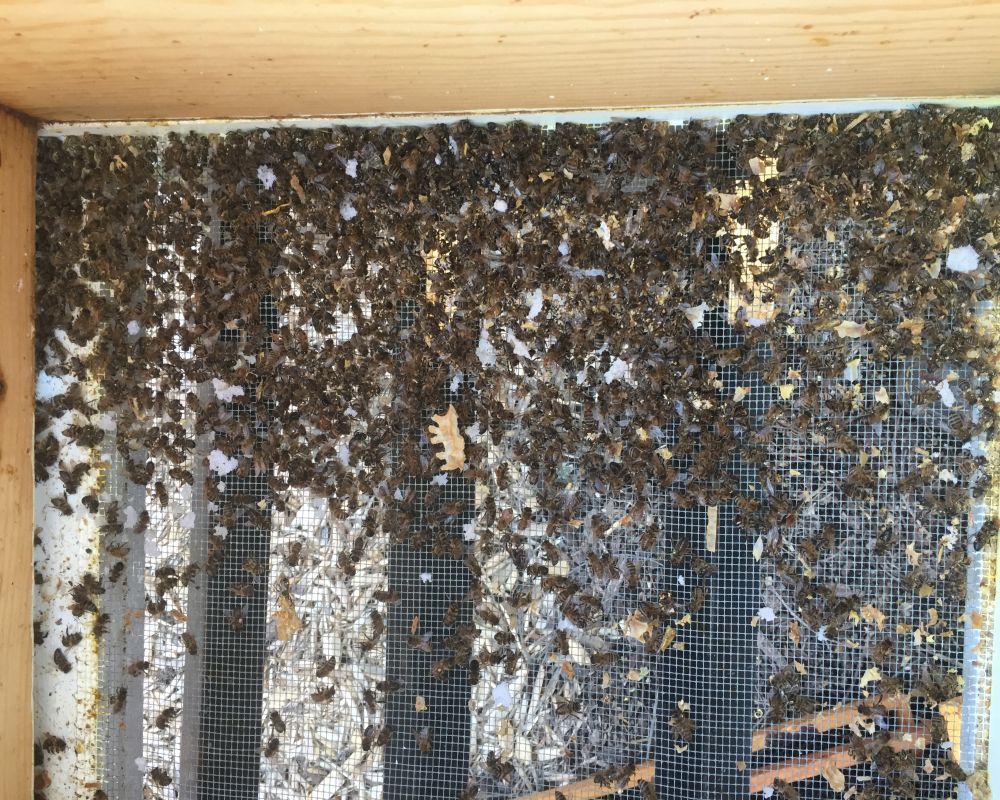
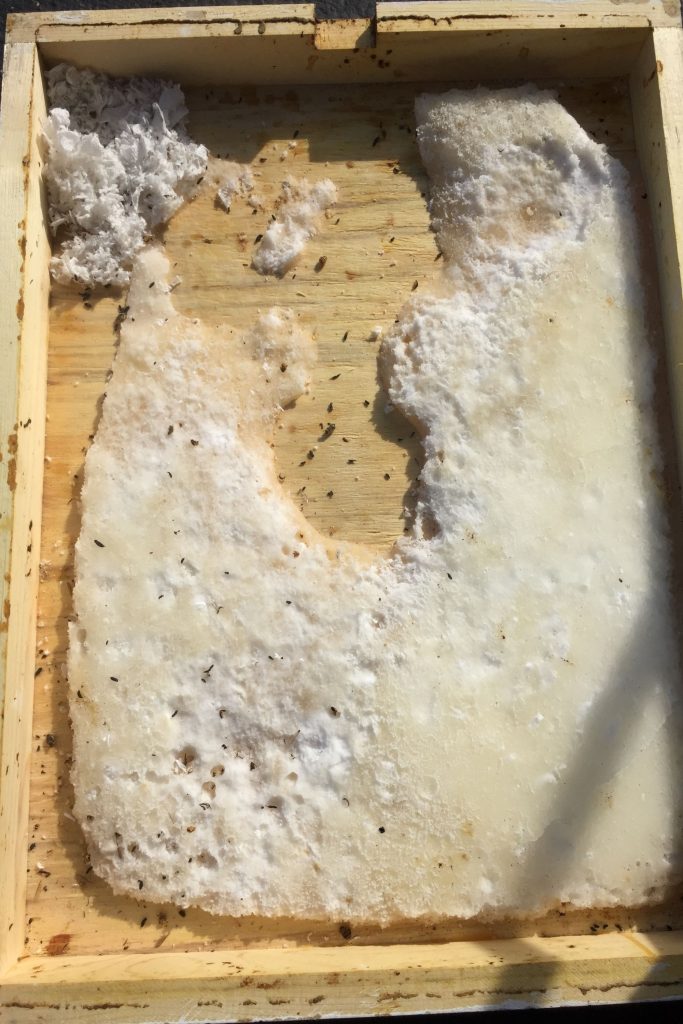
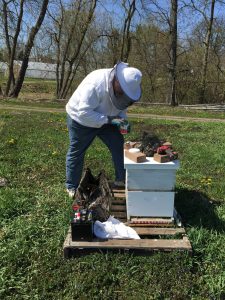
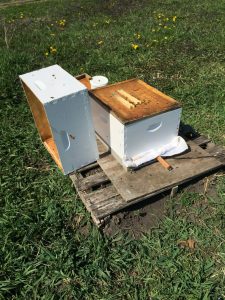
This month we went out to the bee yard to do our second check on the bee hives.   We cleaned out the bottom of the hives on our surviving hives.  They were packed with dead bees and sugar granules.  The hives can have more air flow now. 
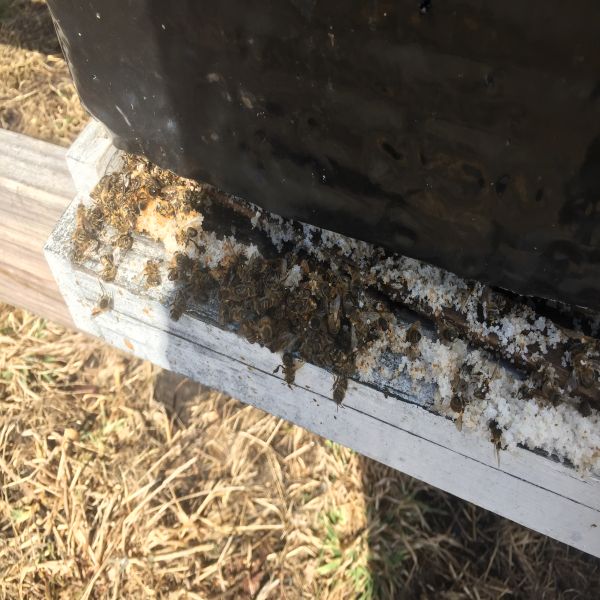
We also evaluated the health of the bees without digging into the hives and checking any frames.  It is still too cold to pull frames; we do not want to chill the brood.  Last month, we placed pollen patties in our hives.  This month when we checked the hives, some of the hives ate most or all of their pollen patties.  We know this is a good hive with an active laying queen.  The areas where we produce our Spring Honey we gave them 2 patties to make sure they have enough to really get their numbers up for the early honey.  The hives where they did not take any pollen are ones where we know we have queen trouble.  Either they lost their queen or she is not really gearing up for anything.  We will be replacing those hives with a package.  In the past, we would get a queen and bulk up the hive with bees from other hives.  This is just getting to be too much work.  Usually these bees are not ready for the honey flow and they tend to not do much for the year.  So this year we decided to just get a 2 lb package for these hives and go from there.

We started cleaning out the hives where the bees died over Winter to make room for new bees.  We have been finding a lot of pollen packed frames that we need to throw out since there is no room to lay eggs.  We will be adding new, undrawn frames.  The new bees better be ready to build.  They have a lot of it to do.

There has been some really nice days in March.  We had 2 days where it was over 60!  The bees were out enjoying the sunny days.  (Picture of bees on brick)  Generally Mother Nature is so mean – Here’s a 40 degree day –with rain!  Want a nice sunny day?  Here’s 15 degrees! HAHAHAHA!

Usually the packages of new bees arrive at the end of March.  But this year it has been pushed back until April.  So we have a few more weeks to get everything ready.

Next Month’s Chores

  • Picking up and Installing New Packages
  • Making sugar syrup to get the new bees started
  • Do a thorough check on the hives that survived winter
  • Removing candy boards and hive wrap
Posted on

So You Want to be a Drone Bee…

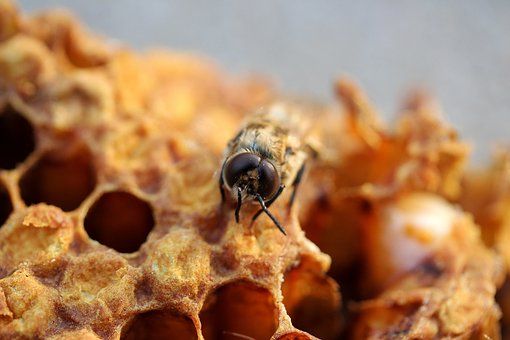
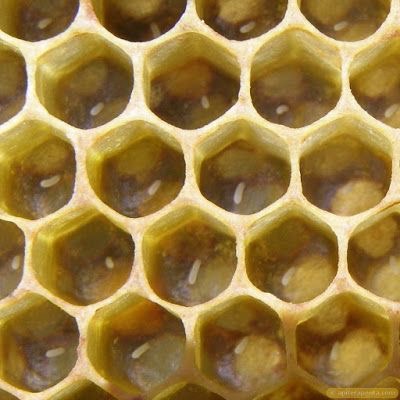
You start out as an unfertilized egg laid in a drone cell. A drone cell is slightly bigger and on the edge and/or corner of the frame.  You are an exact clone of the queen’s genes – only you are male, not female.   After 3 days, you hatch into a larva and are fed Royal Jelly for the next three days.  Then your diet is switched to a less nutritious food called bee bread for the next 6 ½ days.  When the time comes you are ready to build your cocoon and pupate into a bee.  The cell is capped with a domed cap to allow more room for your growth.  You remain in this state for 14 ½ days bringing your total time in the cell to 24 days – the longest of any other member of the hive.

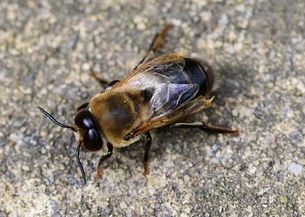
You emerge the most different of anyone in the hive.  You have the same coloring but you are stockier with very large eyes.  Eyes so large they almost touch at the top of your head.  You have a stout, blunt abdomen with no stinger.  Your tongue (proboscis) is shorter than your worker sisters.  You cannot produce wax, protect the hive, forage for food outside of the hive, or clean the hive.  Your sisters, the Worker Bees, have to tend to your needs.  You cannot feed yourself at first.  You have to depend on the worker bees feeding you.  Your cell is cleaned out by worker bees.  You learn where the food is and start to feed yourself, but you still beg for the really good food from your sisters.

You are really expensive for the hive to sustain.   Since you cannot contribute anything to the colony, what are you good for?  One word – Mating.  This is the only thing that Drones are bred for.  You are an exact copy genetically of the queen since you started as an unfertilized egg.  You are here to pass on the genes of the queen.  You are also a status symbol of how “wealthy” the hive is.  They are doing so well that they can afford to house and feed anyone that cannot contribute back to the hive.

You start your days orienting yourself outside of the hive.  You fly in short bursts further and further away from the hive to gather your surroundings.  You are getting ready to find a Drone Congregation Area (DCA) to mate with a queen.   You have to find your way back in case you do not mate.  You go out looking for the DCA.  Drones release their own pheromones.  This helps to find the area.  Every day you go out to these areas.  If you do not mate you come back to the hive and beg for more food.    

You are so excited to mate; you and all the other drones will take off chasing after anything the “flies” through your area – other insects, even rocks thrown at you.  Finally a queen comes by her pheromones alerting you to her presence.  You and everyone else in the area pick up on this signal.  You all chase her down.  Luckily, she will mate with several other Drones – so you have a shot. 

You watch as another Drone mates with the queen first.  He instantly becomes paralyzed.   He gets bent around to the underside of the queen still attached to her.  His appendage gets ripped off and the queen flies away with it as he falls to the ground dead.  Maybe it’s a good thing you have yet to mate, but you are not bright enough to figure that out.

Since a lot of time and energy go into keeping drones, during a dearth (or a lack of forage) the oldest Drone larva is pulled from the cell and killed.  If this dearth continues the more Drones that are killed.  They need to sacrifice the ones that do not add to the production of the hive until the dearth is over.  But this year is a good year and you are able to live a long time trying to find a mate.

But alas there were no queens to mate with.  The days are getting colder and shorter.  The food sources are dwindling down.  Finally one day the sisters that you beg for food from, the ones that have taken care of you all summer long, push you out of the hive.  You are ejected with all your other brothers.  You are now starving and cold where you succumb to your new living conditions.

Posted on

So You Decided to Keep Bees – The Keys to Successful Beekeeping

Part II – Buying the Essentials

You found out you can keep bees in your backyard, you joined a club, took some classes, and found a mentor.  You have some experience under your belt and you still want to keep bees.  Congratulations. The next few points are for those that are ready to buy some bees!

  • Decide what type of Beekeeper you will be?

This is the nitty gritty details.  How many hives will you have?  Do you want to grow it into a business or remain a hobbyist?  How are you going to harvest your honey? What storage method are you going to have? Where will you keep the honey?  What jars are you going to use?  Are you going to sell your honey, or give it all away as gifts?  Where are you going to have your hives – all in your backyard, neighbors/family yards or on land farther away?  Be like Santa – make a list and check it twice.  Check it twice more.  If you did your due diligence you will have a general knowledge of what you want to do.  

(For simplicity sake, I’ll talk about keeping bees in your own backyard.  I’ll l write about keeping bees in other peoples yards at a later time.  That is an adventure in and of itself!)

  • Location, Location, Location –
    • Where in the backyard are you going to keep your hives? 
    • What is the landscape?  Sun, wind, trees, housing, food. 
    • Remember the prettiest place many not be the most convenient. 
    • Where are you going to keep your equipment in the off season?
  • Have a budget – If you want to make a small fortune in beekeeping – start with a large one.

Beekeeping can get real expensive really fast.  Don’t forget supplementary items – bottles for honey, labels, sugar, pollen.  It is cheaper to assemble and paint your own equipment, but you also have to have the time, talent, and room to do so.

  • Don’t forget to also budget time – it takes time to build equipment, make syrup, check bees, and harvest honey.

  • You have to plan early

Winter is our off season.  This is the time to plan for the new year.  Since you waited a year to get your bees you can enjoy some savings.  Think of all the equipment and tools you will need.  Make a list.  Most beekeeping companies will have their biggest sales around Thanksgiving.  Your mentor will tell you good places to buy packages from.  Reserve your packages early – think January.

Keep in mind most beekeeping stores aren’t open during the weekend.  Spring is a very busy time for any beekeeping store so plan early. 

Stay tuned for Part 3….

Posted on

So You Decided to Keep Bees – The Keys to Successful Beekeeping

Part I – Before You Buy Any Equipment

Beekeeping should not be a compulsive endeavor.  Take the time to research and plan this new endevor.  If you have the patience, I would tell you to wait a year before actually buying bees.  The following posts will help outline a procedure that I have learned in my years of beekeeping that will lead to the most success. 

Beekeeping should be a fun endeavor, not something that is frustrating and a drag.  Remember beekeeping is farming and nothing ever goes the way it should.  Bees, like most animals, do not read the same books that we do.  The more tools in your tool kit the better off you will be when trouble arises.  Do not get bogged down in certain procedures of beekeeping.

  • First thing to do – Look at your Local and State Laws

Like I said, this is farming and honey bees are considered livestock.  Look at your livestock laws. Call the Code Enforcement Office. Keep in mind that some municipalities do not allow honey bees.  Some municipalities only allow a certain number of hives. Some municipalities and/or states require registration and/or fees.  Some may require certain provisions before getting a bee hive – fencing, hives X feet away from buildings/property lines/streets/sidewalks, etc.  Do your research before purchasing anything.  Make sure you are within the confines of the law.

For Illinois – http://beekeepingregulations.com/

  • Read Books, Magazines, Watch YouTube Videos

But keep in mind – Everyone with a camera thinks they are an expert.

Another thing to keep in mind is location.  Are they in a very rural area with no one else around them?  Or are they in an urban setting with several different beekeepers in the area?  Are they in the US?  Are they in the north or south?  Desert, rainy, humid, dry?  Even in Illinois what you do up north is different then what people do in the south in terms of getting ready for Winter.

How long have they been keeping bees? How white is their hives and equipment?   Your equipment and hives do not stay clean for very long.   

How many hives do they take care of?  Are they caring for 2 hives or 100?  Are they migratory pollinators? 

Do they cover mites and diseases? 

You are not going to learn everything that there is to know beekeeping.  The most important thing is to get some basic knowledge.  Hands-on learning is the most valuable knowledge that you will get.

  • Join a Club (Or as one of our landlords called it – A Support Group.)

You ask 10 beekeepers a question and you will get 15 different answers.  That is true for any farming adventure – row cropping, gardening, beef, chickens, etc.  This will help you accumulate more tools for your tool box. 

The club can also help you with Local and State Laws.  They also invite speakers or have an open discussion on beekeeping issues.  Some will host classes or have work days so you can get more practice beekeeping.  You can also find people to partner up with – can split shipping costs or buy a couple bottles off of them, borrow equipment, have help during harvest season, keep an eye on things when you are out of town.

They will help with the best methods for your area – Winter prep, Spring, etc.  Good honey flow days.

 Another big reason to join a group is to find a guy that sells packages.  I highly recommend not buying packages through the mail.   No one at the post office are not beekeepers and will not have the respect for your bees as other beekeepers will.

Find out what equipment is absolutely necessary and what is just for fun.   You can also rent equipment (like an extractor) or have a space in a yard with the club.

Take a Class

The longer the class goes throughout the year the better.  You will have an idea of what needs to be done at different times of the year.  Find one with hands on experience.  The more practice you have the better you will be.  There are plenty of beginner beekeeping classes out there.  Do not be afraid to spend some money to get a good hands-on education.

  • Find a Mentor and Work with Them for a Year

This is a good trial to make sure you really want to do this.  You will have more of a one-on-one learning experience.  You may work at odd times or for a whole day.  Especially if you are lucky to find one with lots of hives and yards.  Don’t be afraid to get your hands dirty.  They will give you techniques and lots of practice.  Learn what tools and techniques work best for you.  If you can, work with them the whole year – from package installation to honey harvest to winter preparations.  A mentor is someone you can bounce ideas off of throughout your beekeeping experience.

Stay tuned for Part Two……

Posted on

Life in the Bee Yard – February 2019

The Bee Yard

We checked candy boards.  Some were completely empty.  Most were about half finished.  It all depends on the size of the hive, how much honey they had stored, and how cold the weather was.  We did not make a lot of extra boards this year.  Time just ran out on us.  We are hoping that Spring will get here earlier then later and we can start feeding sugar syrup.  We had starting to feed pollen.  The longer days kick start the queen into making more bees.  They start early to make sure the new bees are mature enough to fly and gather honey or pollen when the weather turns warm. 

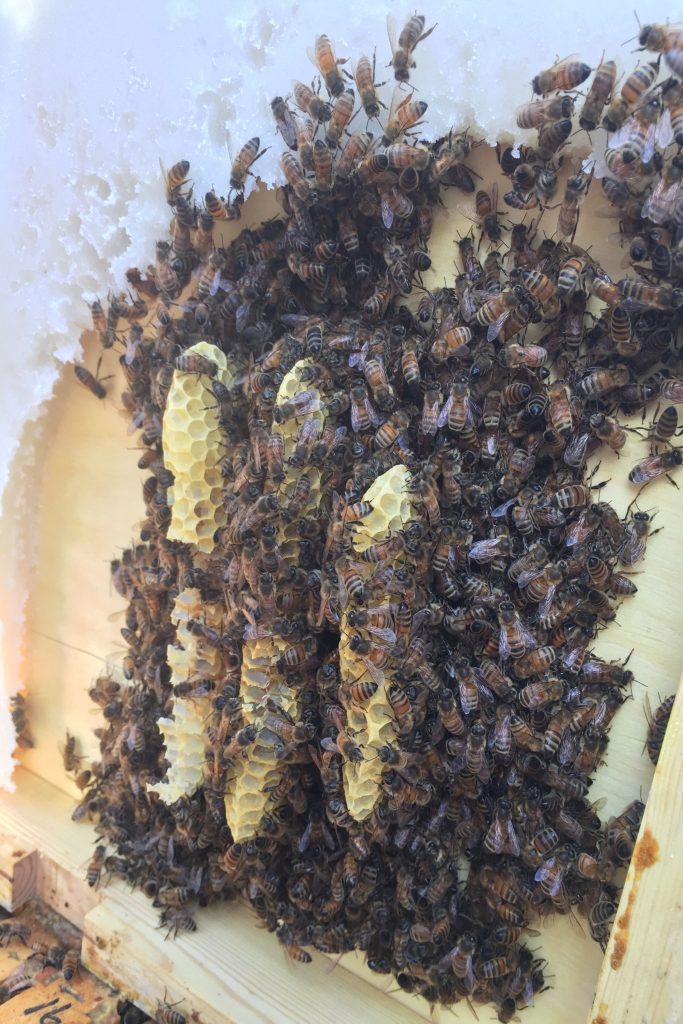
A couple of hives were already building comb on the candy boards.  It is a little early but a sign of new bees.  A bee’s wax production matures around 14 days.  In those hives the queen started production very early and there are a lot of new bees to make wax. 

We have lost 9 more hives so far this year.  We will need to order 15 packages to keep with the same number of hives as last year.  The prices are out and everyone is selling packages.  We will keep an eye on things and update our order if needed before arrival.

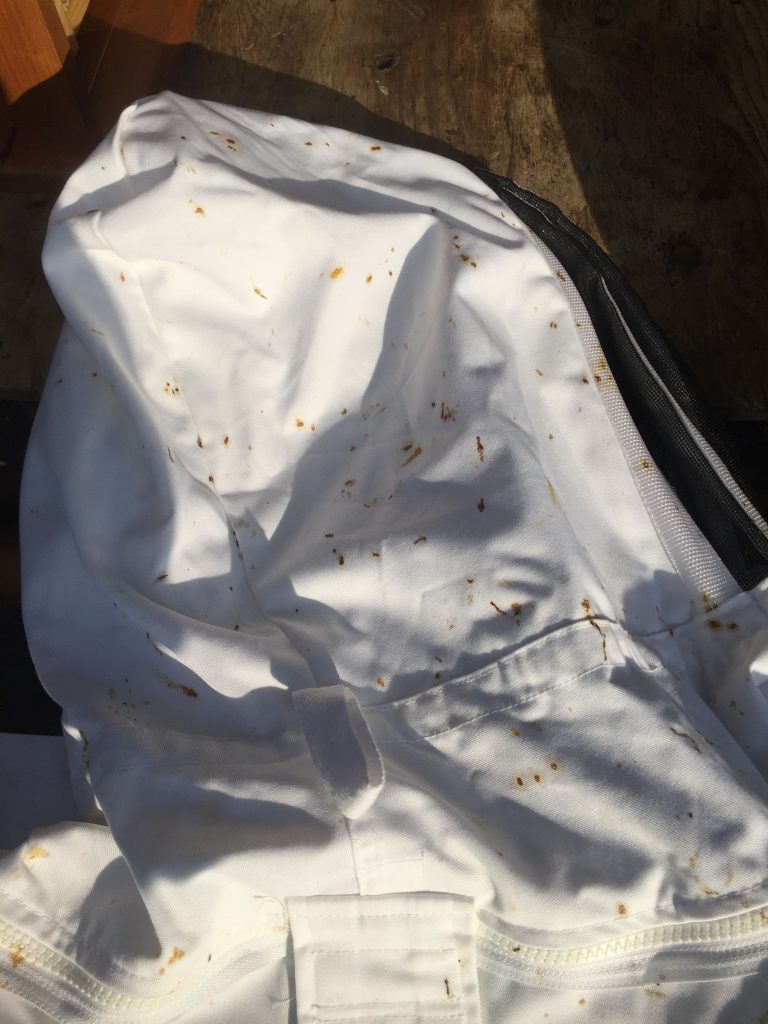
We were pooped on a lot when we were checking bees.  These bee jackets were clean before we started.  Yuck!


Keeping Score

At the height of the beekeeping season in 2018, we had 59 hives total.  We lost 9 hives before winter, mostly due to queen issues.  Now after we checked, we found we lost 6 more hives.

We switched out 11 boards, and boosted some hives with chunks of candy board that fell off another board.  We had just enough boards for this round.  We may have to make some more, or make soft fondant sugar if it’s still too cold to feed liquid syrup.

February Chores

The bee packages usually come at the end of March.  We have to make sure the hives with dead outs are cleaned up.  Double check that our equipment is clean and in good working condition.  Make sure everything is set up and ready to go.

Posted on

Life in the Bee Yard – January 2019


Happy New Year!
Happy Birthday to Beekeeper Marty!

The Bee Yard

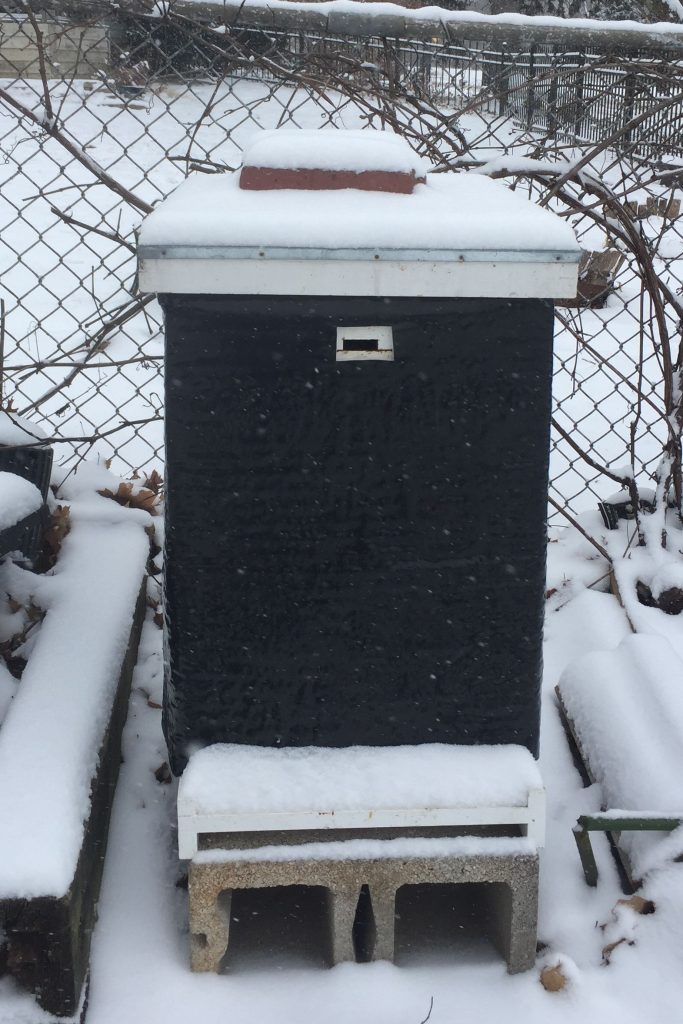
There is not much going on with the bees right now.  They are all nestled away in their hives, wrapped up, and eating their honey or candy board.   Good thing for us.  We have had cold weather, snow, icy rain, warm weather (Yes, 50° is considered warm now) – Just your typical Chicago January.


January Chores

Since there is no need to run out to the bee yards, I have been working on products to sell at the upcoming craft shows this year – bottling honey, soap, lotion, candy, honey straws.  We have 3 shows in March alone! 

Kane County Flea Market, Kane County Fair Grounds, St. Charles, IL – March 2 & 3
Carl Sandburg High School, Orland Park, IL – March 9 & 10
College of DuPage Craft Show, PE Building, Glen Ellyn, IL – March 23 & 24

For our other events – Check out our Calendar of Events – https://www.twobeekeepers.com/events/

Also on the agenda is to make the woodenware we need for the upcoming year.  Marty has put together about 300 new frames for the brood boxes.  We have old frames, poorly drawn out frames, and frames packed with bad or old pollen that need to be removed from the hive.

This is the month to order packages.  We have an idea of how many packages we want to order, but we are in a holding pattern.  The package price has not been released yet.  The price goes up every year.  We receive our packages from California after almond season and the season was horrible this year.  The bees had a hard time and their numbers did not build up as well as other years.  They are not sure how many packages they are able to create.  Beekeeping is getting harder every year.

Posted on

Mite Treatment Update for Winter 2018

First of all, we would like to apologize for the lack up updates in 2017.  The last update was on varroa mite treatments and although we had other articles planned, we were unable get them written due to a hectic schedule and the resulting exhaustion.  So, it seems only fitting to pick things back up in 2018 where we left off – with a varroa mite summary of our efforts from last year

Our goals were outlined previously but I will summarize them very briefly right now.  Spring, summer and fall testing and treatments as needed.  Spring treatments included oxalic acid vaporization of the new packages and spring mite treatments with oxalic acid dribble. Summer treatment was oxalic acid dribble followed up with Mite Away Quick Strips when mite tests showed that it was required.  Fall treatment was done with Mite Away Quick Strips and Apivar if mite counts were too high.

As indicated by Jerry Hayes and Randy Oliver in their many articles on mite control, we try to have no more than 3 mites per 100 bees.  One mite or no mites would be lovely but rarely possible!  So, we set our goal to be under 3 mites per 100.

When we purchased new replacement bees for our dead outs, we vaporized all of them.  I have heard from many sources that beekeepers believe that mites are only on bees that are inside a hive.  It is thought that package bees do not come with mites.  This is ABSOLUTELY NOT TRUE!!!!  Packages can come with mites, hive beetles, etc!!!  When we installed our new packages, we made sure that we hade a clean West Trap beneath the screened bottom boards.  This is used to catch the falling mites so we can get a count.  After the bees were settled, but before brood was in the advanced larval stages we vaporized our new packages.  Low and behold we had mites dropping off.  And not just two or three.  We are talking about as many as a few dozen.  This is enough mites to “seed” a hive to have huge problems by late summer or very early fall.

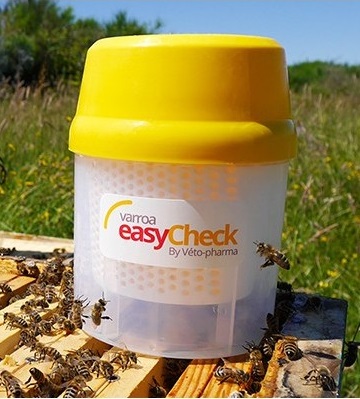
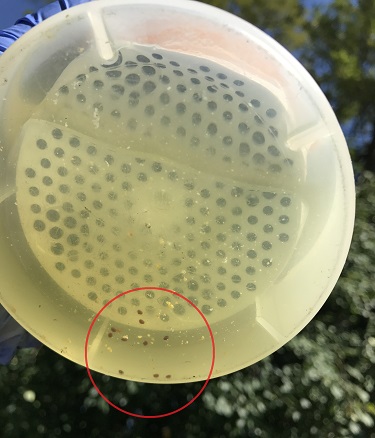
Varroa Easy Check PictureDuring the summer we tested with our Varroa Easy Check.  This is a tool that EVERY beekeeper should own.  Testing was done monthly from July through the end of the season.  When we found more than three mites per hundred we would dribble with oxalic acid solution. If this did not fix things we would treat with mite away quick strips.  Our findings showed that dribble is a poor method of mite treatment as it more of a flash treatment that only has an effect on a few phoretic mites.  Mites in the cells and under the capping, which are the vast majority of the mite population in a colony, are unaffected by the treatment.

After the summer honey flow, we saw mite levels rise rather rapidly.  Meaning our test results were showing doubling or tripling of the mite levels instead of a small increase.  This is typical to what researches have found as well so we were disappointed but understood what was happening. We found that dribbling with oxalic acid did nothing to stop this increase so we resorted to mite away quick strips and even Apivar to stop the build up of the mites.

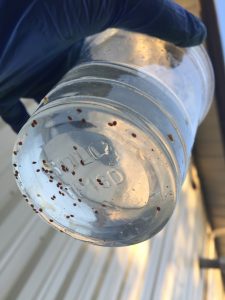
After reviewing our records, we lost no hives to the mites in the fall as opposed to 10-20% like last year due to our test and treat methods.  We did loose one to a failed queen that we were not able to correct properly during the late summer or early fall.  At the time of this writing, our winter losses stand at four hives to mites, queen failures, or a combination of both.  We tested the dead bees that were left in between frames and boxes on dead outs and found high levels of mites amongst the dead bees.  This should be a recommended procedure to determine colony death cause!!!  With these hives dead, our total losses for the year stand at 5 out of 52 or approximately 10%. Mites In Mite Checker

Of course, we do have some that are a little on the weak side and they could fail.  As always, with beekeeping this is a distinct possibility.  Mite levels could still be high and cold weather can take its toll.  A report on this will have to follow at a later date.

Are we happy with our treatment plan? OF COURSE!  We have not lost this few bees at this point in the winter in a long time.  I am also happy to report that other larger beekeepers that followed similar treatment plans had similar or even better results.  Unfortunately, beekeepers that never treated or treated too late are suffering staggering losses.  Anywhere from 50% to 100%.  This is proof that doing nothing does not work, no matter what beekeeping religion you practice.  So, in short, we will be testing and treating as often, if not more often, again in 2018.

This we want to try in 2018: Formic Pro.  It has a longer shelf life than its predecessor Mite Away Quick Strips which is a huge bonus.  Based on the results from people who used Formic Pro in 2017, it looks like it may be a little gentler because it has a longer treatment time with a slower release than Mite Away.  We will see how it works out for us.

We noticed that areas where beekeepers manage bees in a Laissez Faire manner, there were more mites and many more mite problems despite rigorous treatments.  Systemic treatments were necessary to keep the mite population down to a manageable level.  This should not have been required, but was required because other beekeepers do not practice good animal husbandry.  When one is in charge of livestock they are taking care of the animals from birth until death.  Not treating not only hurts the livestock that is owned but in this case, causes great detriment to neighboring livestock and the few feral colonies that are left.  Part of being a good neighbor is having good husbandry practices.  We all need to be good neighbors!

Posted on

Mites are a Never Ending Problem

Did you battle varroa mites this year?  How well did you do?  Did you win or lose?

Our 2016 varroa management strategy was simple.  We were going to treat, treat, and treat some more. Here was our treatment plan.

  1. Treat in the Spring.
    1. Treat all new packages with one oxalic acid vaporization after being hived but before brood was laid.
    2. Treat all over wintered hives before they build up to far with oxalic acid vaporization three times 7-9 days apart.
  2. Treat in the late Summer (after honey harvest)
    1. Treat all hives with oxalic acid vaporization three times 7-9 days apart.
  3. Treat if necessary in the Fall.
    1. Treat again with oxalic acid vaporization, apiguard, or apivar depending on the weather.
    2. Treat with oxalic acid dribble if necessary.

We completed part one of the plan and we were in the clear. We did not see any queen problems caused by vaporization.  We did have some slow queens and some that the bees did not like. They raised new ones and those hives went on to build up nicely (eventually). Most hives produced honey.  Some that had queen issues did not produce much if missed their main flow.  But by June, overall, our hives were stronger than ever.  They were producing a good honey crop for us and appeared very healthy.  We even had a visit from our local inspectors to see how we were doing and they found no problems and no mites when they tested.

When we completed part two in September we had harvested our main honey crop.  A little bit of goldenrod honey was being made on our western bee yard.  An exhausting summer was completed.  We had just completed 6 mite treatments for the year.  Maybe we were ahead of the curve.

Reports started coming in about neighbors having very high mite counts.  And not just a little high. They were astronomically high.  Bee inspectors had diagnosed parasitic mite syndrome on entire apiaries not far from ours.  All of those bees were going to be lost.  At this point we were very worried about our bees and we decided to do some mite testing of our own.  The samples we took were on the lower side (comparatively) in some of our bee yards.  But in yards close to other problem sites the mite counts were extremely high.  There were so many mites in the bottom of the test cup that we could not count them all.

This is a bad situation. It is highly likely that our previously treated hives became mite infested by neighboring colonies with high counts.  These mites were probably vectoring diseases and our hives were probably going to die.  So what do do?

Part of animal husbandry is taking proper care of the creatures that you are entrusted with – from life until death.  Because of our duty, we decided to treat our bees even if they were eventually going to die.  It was imperative that we do so right away.  Even if they die or abscond it was important that we do not let any more mites out into the environment.  These mites would endanger other neighboring colonies and these would become a victim like we were.  This is being a good neighbor to our neighbors and our neighbor’s bees.

So an emergency trip to Dadant was made and treatment products were purchased.  Spacer boards and Apiguard (Thymol) was purchased for as many colonies as we could get product for.  Everything else would get ApiVar (Amitraz).  The treatments would be supplemented with oxalic acid dribble every 7-9 days.

By the end of the season we had treated 9 or 10 times depending on how you calculate it.  This is a lot of work to just try to save our bees from someone else’s lack of animal husbandry.  It is also a lot of work to do when you are just going to lose a high percentage of the colonies anyway.

And lose colonies we did.  All of the colonies that were near other high mite count apiaries ended up with high mite counts and mite related diseases.  They all failed.  These yards experienced 80% losses or more.

Overall our losses are at 50%.  These types of losses do not make any kind of beekeeping operation sustainable.  If a dairy operation lost half of its calves each year or half of its heifers it would be a disaster.  The only reason why 50% losses for beekeeping is not taken notice by many is that the bees can be more resilient than the beekeeper under certain circumstances.

Lately, the majority of the beekeepers are failing their bees by not testing and treating for mites in a timely manner.  This is a failure of the mission of animal husbandry.  According to a recent article in Bee Culture Magazine, commercial beekeepers treat anywhere from 6-10 times or more a year.  In contrast most small beekeepers do very little or nothing at all. (Kim Flottum Bee Culture Jan 2017)

The more articles that we read about varroa mites, the more they mention varroa bombs and describe the problems we are having.   (Jerry Hayes, Randy Oliver American Bee Journal Vol. 157 No.1; Toni Burnham Bee Culture Jan 2017; Randy Oliver Vol. 156 No 12; Randy Oliver Vol. 156 No 11).  We have been experiencing this for the last few seasons.  Despite our treatments bees get reinfected and end up dying.

One lesson should be learned from all of this. No one beekeeper can keep bees alone or solve his or her mite problems by themself.  Bees are social insects.  Beekeepers need to be social and work together to fight the problem before all the gains we are making in beekeeping in our home towns are lost.  Be a good beekeeper. Be a good neighbor.

We will be feeding pollen patties next week and starting to clean out dead outs.  Hopefully the losses will not get any worse.  By the time the replacement bees arrive, we need to have our mite management plan ready.  Have you figured out your plan for 2017?


Posted on

Two Queens in One Hive

Most beekeeping books and beekeepers will always agree that there is always one active queen in a hive.  There should never be two.  Even so, it sometimes does happen.

The hive that this picture was taken from was a big
one.  It over wintered very well and it built up extremely early.  The queen was a prolific layer.  The bees managed to produced a box of ross rounds, a box of comb honey and filled two honey supers.  After the honey was removed for the season we tested and treated for mites because, as is true with all large colonies, there were mites present and even signs of deformed wing virus.

There was a possible risk candidate for throwing a swarm since the hive was congested.  The queen also did not stop laying eggs.  Since nectar flow in this area virtually stops after July we were feeding, but it did not help much.  The hive most likely built some swarm cells in between our more detailed inspections.

When we finally did a detailed inspection there was evidence of many swarm cells and it appeared that there were many queens released.  At least one left with a swarm.  One daugher appeared to stay behind with mom.

Mite levels were high before treatment.  Treatment started before the swarm occurred.  After the mite treatment we found very low mite counts.  There were plenty of eggs being laid, but not really enough workers.  This late in the season it would be fair to predict failure.  Only time will tell if this hive will survive. Did the prolific queen cause the hive to swarm? Did the mite treatment, Thymol with oxalic dribble every seven days, cause the hive to swarm?  Did the high mite load cause the swarm?  We may never know.  We only have a few clews and the bees are not talking.

Posted on

Oxalic Acid for Mite Control

This year we have started using oxalic acid in the spring instead of MAQS or mite away quick strips. Both oxalic acid and formic acid are present in honey and are organic acids so they are considered natural or organic miticide treatments.  Even so, they are quite harsh to work with.

Formic acid has a very strong smell.  It seems to be more potent than vinegar and more irritating.  It is very effective and tests by the MAQS manufacturer say that it will kill mites under cappings.  This is important.  Even so, we have found it to be hard on the bees and especially the queens.  It is hard to prove if they become physically damaged by my the miticide or if the prolonged exposure to the smelly acid causes the bees to think that her queen pheromone is not present, and deduce that she is failing or not actually alive anymore despite the fact that she is present.  Based on discussions we have had with other beekeepers this seems to be a problem that can happen, but it is not always a regular occurrence.   Weather and age of the queen probably play into this quite a bit as well.  We have also heard that formic acid is not as good as it used to be at killing mites.  These issues and reports are pushing us to try something new.

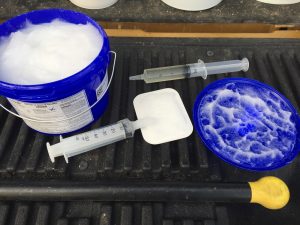
Oxalic acid has been used in Europe and Canada for many years.  There are two methods of application – vaporization and dribble.  Most beekeepers and scientists that study its effectiveness claim that it kills 90% or more of the mites present on the bees when the treatment is applied.  Even so it does not kill the mites under the cappings.  To do this, vaporization is commonly used to kill the mites within the open cells during periods of low or no brood rearing.  Otherwise the dribble method can be used for easy and quick application.  Randy Oliver has been studying oxalic acid recently and he does prefer the dribble method.

We applied oxalic acid to all of our colonies this spring.  The packages were vaporized with a few days of being installed in their hives.  We also treated all of our overwintered colonies three times approximately eight days apart to kill mites on the bees and in the cells that were open at the time.  Mite testing showed that at the beginning of June, our hives were mite free.  The test we used was the alcohol was test.  A sample of bees are taken, placed in the washing cup or device, rinsed with an alcohol solution, and then the mites that come off the bees are counted.  All of the samples came up zero mites!!!

We will be trying the three treatment vaporization method later in the season to see how it performs in the fall as well.